Page 35 - CanaDream 2025 DVC English
P. 35
OPERATING SYSTEMS IN THE RV
WATER HEATER SOLAR PANELS
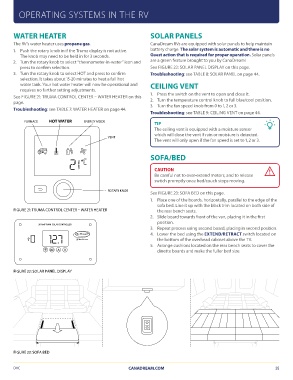
The RV’s water heater uses propane gas. CanaDream RVs are equipped with solar panels to help maintain
battery charge. The solar system is automatic and there is no
1. Push the rotary knob in if the Truma display is not active. Guest action that is required for proper operation. Solar panels
The knob may need to be held in for 3 seconds. are a green feature brought to you by CanaDream!
2. Turn the rotary knob to select “thermometer-in-water” icon and See FIGURE 22: SOLAR PANEL DISPLAY on this page.
press to confirm selection. Troubleshooting: see TABLE 8: SOLAR PANEL on page 44.
3. Turn the rotary knob to select HOT and press to confirm CEILING VENT
selection. It takes about 15-20 minutes to heat a full hot
water tank. Your hot water heater will now be operational and 1. Press the switch on the vent to open and close it.
requires no further setting adjustments. 2. Turn the temperature control knob to full blue/cool position.
3. Turn the fan speed knob from 0 to 1, 2 or 3.
See FIGURE 21: TRUMA CONTROL CENTER – WATER HEATER on this Troubleshooting: see TABLE 9: CEILING VENT on page 44.
page.
TIP
Troubleshooting: see TABLE 7: WATER HEATER on page 44. The ceiling vent is equipped with a moisture sensor
which will close the vent if rain or moisture is detected.
FURNACE HOT WATER ENERGY MODE The vent will only open if the fan speed is set to 1, 2 or 3.
VENT
ROTARY KNOB SOFA/BED
FIGURE 21: TRUMA CONTROL CENTER – WATER HEATER CAUTION
Be careful not to over-extend motors, and to release
30 AMP PWM SOLAR CONTROLLER switch promptly once bed/couch stops moving.
12.7 See FIGURE 23: SOFA BED on this page.
AAC MAX B 1. Place one of the boards, horizontally, parallel to the edge of the
BOOST sofa bed. Line it up with the black trim located on both side of
the rear bench seats.
2. Slide board towards front of the van, placing it in the first
position.
3. Repeat process using second board, placing in second position.
4. Lower the bed using the EXTEND/RETRACT switch located on
the bottom of the overhead cabinet above the TV.
5. Arrange cushions located on the rear bench seats to cover the
dinette boards and make the fuller bed size.
FIGURE 22: SOLAR PANEL DISPLAY
FIGURE 23: SOFA BED CANADREAM.COM 35
DVC
WATER HEATER SOLAR PANELS
The RV’s water heater uses propane gas. CanaDream RVs are equipped with solar panels to help maintain
battery charge. The solar system is automatic and there is no
1. Push the rotary knob in if the Truma display is not active. Guest action that is required for proper operation. Solar panels
The knob may need to be held in for 3 seconds. are a green feature brought to you by CanaDream!
2. Turn the rotary knob to select “thermometer-in-water” icon and See FIGURE 22: SOLAR PANEL DISPLAY on this page.
press to confirm selection. Troubleshooting: see TABLE 8: SOLAR PANEL on page 44.
3. Turn the rotary knob to select HOT and press to confirm CEILING VENT
selection. It takes about 15-20 minutes to heat a full hot
water tank. Your hot water heater will now be operational and 1. Press the switch on the vent to open and close it.
requires no further setting adjustments. 2. Turn the temperature control knob to full blue/cool position.
3. Turn the fan speed knob from 0 to 1, 2 or 3.
See FIGURE 21: TRUMA CONTROL CENTER – WATER HEATER on this Troubleshooting: see TABLE 9: CEILING VENT on page 44.
page.
TIP
Troubleshooting: see TABLE 7: WATER HEATER on page 44. The ceiling vent is equipped with a moisture sensor
which will close the vent if rain or moisture is detected.
FURNACE HOT WATER ENERGY MODE The vent will only open if the fan speed is set to 1, 2 or 3.
VENT
ROTARY KNOB SOFA/BED
FIGURE 21: TRUMA CONTROL CENTER – WATER HEATER CAUTION
Be careful not to over-extend motors, and to release
30 AMP PWM SOLAR CONTROLLER switch promptly once bed/couch stops moving.
12.7 See FIGURE 23: SOFA BED on this page.
AAC MAX B 1. Place one of the boards, horizontally, parallel to the edge of the
BOOST sofa bed. Line it up with the black trim located on both side of
the rear bench seats.
2. Slide board towards front of the van, placing it in the first
position.
3. Repeat process using second board, placing in second position.
4. Lower the bed using the EXTEND/RETRACT switch located on
the bottom of the overhead cabinet above the TV.
5. Arrange cushions located on the rear bench seats to cover the
dinette boards and make the fuller bed size.
FIGURE 22: SOLAR PANEL DISPLAY
FIGURE 23: SOFA BED CANADREAM.COM 35
DVC